A briefing on the options to turbocharge your WordPress Blog
With more blogs and company sites hosted on WordPress today, it's important for marketers and agencies to understand the options available to optimise Page Speed for this key platform. Marketers need to ask providers or their technical team about page download speeds and optimisations used such as content distribution networks (CDNs), caching and code minimisation. In this post I'll explain some of these concepts and give some practical examples of how to implement these features.
The need for a focus on Page Speed improvement
In a digitally connected world, the speed of websites is becoming increasingly important for consumers. In 2006, Amazon.com reported increases in revenue of 1% for every 100ms of page load improvement.
Reports by the Aberdeen Group in 2008 stated that a one-second delay in load time resulted in 11% fewer page views, a 16% decrease in customer satisfaction and a 7% decrease in conversion.
Experiments in 2009 by Google demonstrated that increasing latency from 100ms to 400ms reduces the daily number of Google searches per user by 0.2%.
Mozilla hypothesised that a one-second increase in page load time decreases conversions by 2.7%. In 2010, they conducted an experiment in which they optimised their Firefox download pages, reducing page load times from an average of 7 seconds to 4.8 seconds. They then carried out an A/B test whereby the optimised version of the site was presented to 50% of users. For these users, download conversions increased by 15%, translating to around 10 million additional Firefox downloads per year.
According to a study by Forrester, consumers now expect to wait no longer than two seconds for a web page to render.
These studies indicate that there is a direct relationship between web page speed and user engagement and conversion. Site owners may be tempted to simplify their web pages by cutting down on images and video content.
However, creating simple web pages with limited functionality in order to decrease page size and load times is not recommended since although customers demand speed, they also value rich online experiences.
As a result, more businesses are considering front-end optimisation solutions in order to reduce page download times. However, performing optimisation on websites requires specialist programming skills and can be costly.
CDNs often require set-up, configuration and integration by experts. Web Application Acceleration Software makes it easier to deploy optimised content but can also be expensive and incur ongoing costs. Even if this is achieved, trying to keep site optimisations up-to-date with the fast-moving operating system/device/browser landscape is time consuming and expensive.
Improving web page performance in WordPress
However, for businesses or individuals using WordPress, there are some simple to implement and inexpensive solutions to issues of slow loading web pages.
Below are some instructions on how you can speed up your WordPress blog without spending a lot of time or money on front-end optimisation work:
A Content Delivery Network (CDN) is a large distributed network of servers deployed in multiple locations globally. The purpose of CDNs is to serve content from the closest geographical location to the end user. This serves to speed up the loading of scripts, stylesheets and images which are typically static, particularly for users that are located in territories that are relatively far away from the location of a website’s server.
While there are many CDN solutions available (EdgeCast, Akamai, CloudFare, MaxCDN) – my preferred CDN for ease of use and cost is Amazon Cloudfront. While many other CDN providers charge monthly or annual subscriptions, Amazon charge for usage on a pay-as-you-go basis, with costs for storage starting from just $0.09 per GB per month and costs for content delivery as little as $0.12 per GB.
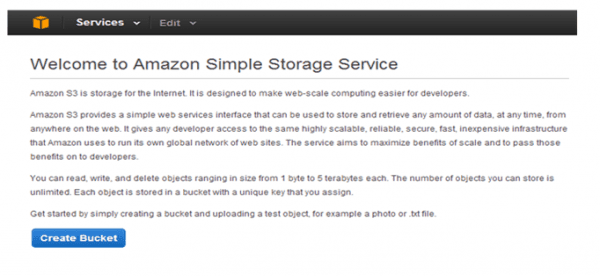
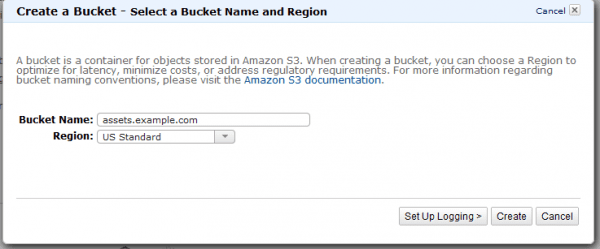
Setting up an Amazon Cloudfront distribution is extremely easy. Firstly, you need to sign up with Amazon Web Services. Once you’ve signed up you’ll need to create what is known as an S3 bucket, which is simply a location in which to store your static website assets.
Amazon S3 has a global namespace so no two S3 buckets can have the same name. S3 bucket names should also not contain upper case letters or underscores and should be between 3 and 63 characters long.
Once the bucket has been created you need to add what is known as a bucket policy which allows for appropriate permissions to be set so that users can view access files contained within your S3 bucket. More information on bucket policies and how to add one to your S3 bucket can be found at S3 browser site.
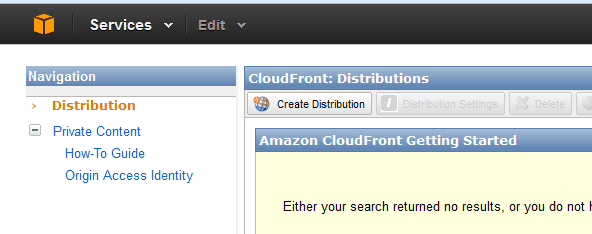
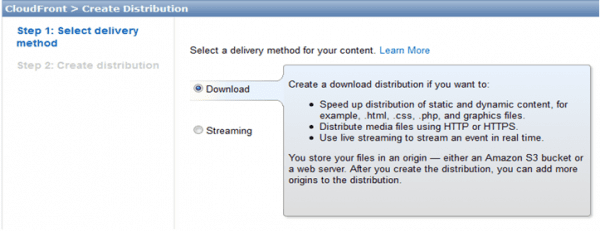
Once you’ve set up your bucket and added a bucket policy, you need to create your CDN distribution by selecting the Amazon Cloudfront icon within the ‘services’ menu and then pressing the ‘create distribution’ button.
The next step allows you to select a distribution type (download or streaming). Here, you should select ‘download’.
The final step in setting up your CDN is to select the bucket you’ve just created from the ‘origin domain name’ dropdown menu.

Finally, just leave the remaining settings as they are and your distribution will be created once you select the ‘create distribution’ option at the bottom of the page. This may take a few minutes but while you’re waiting it’s possible to start setting up WordPress to use your new CDN distribution.
-
Install WP Super Cache and Enable Caching
WP Super Cache is a fast caching engine for WordPress that produces static HTML files from your dynamic WordPress content. What this means is that instead of querying the WordPress database every time a user visits your site, the content is saved in a static HTML file on the server and served to users instead until the next time the content is updated.
Static files are typically much faster to load than dynamic database driven content so by caching files like this, the speed of your site can be improved substantially.
Once WP Super Cache is installed, caching can be switched on by simply selecting the ‘caching on’ option within the WP Super Cache settings.
-
Sync your WordPress content with the CDN
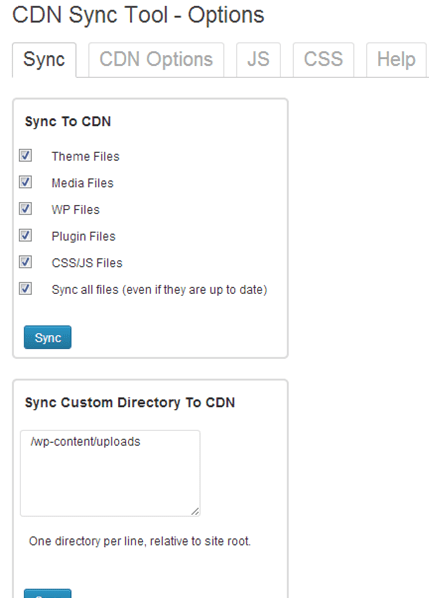
In order for your local WordPress files to be synced with your CDN, you need to download and activate one more plugin – known as the CDN Sync Tool. Once downloaded and activated, a new option called ‘CDN Sync Tool’ will appear in the WordPress settings tab in the left-hand menu. By selecting this option you’re then presented with a screen where you can enter the login credentials for your Amazon account and specify the files to sync with your CDN distribution.
In the ‘Sync’ tab, select ‘sync all files (even if they’re up-to-date)’ and specify the path ‘/wp-content/uploads’ in the option named ‘sync custom directory to CDN’ as shown below.
Then in the ‘CDN options’ tab, you need to select Amazon S3 as your content delivery network as well as specifying your bucket name created earlier.
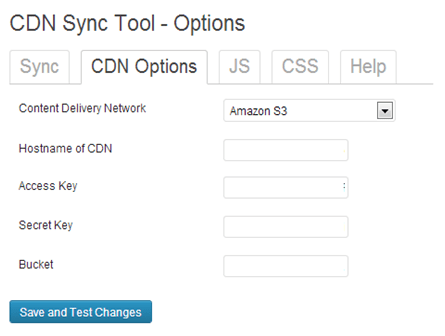
You then need to specify the ‘hostname of your CDN’ which can be found by accessing your CDN distribution settings in Amazon Cloudfront and copying and pasting the ‘Domain Name’.

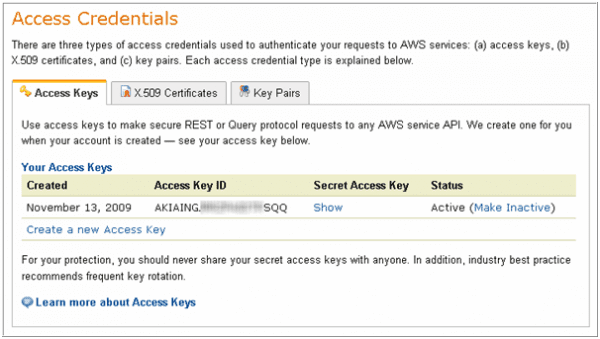
Finally, you need to input your Amazon ‘Access Key’ and ‘Secret Key’ – which can be found in the ‘Security Credentials’ section of your Amazon account as shown below.
-
Enable WP Super Cache to use the CDN
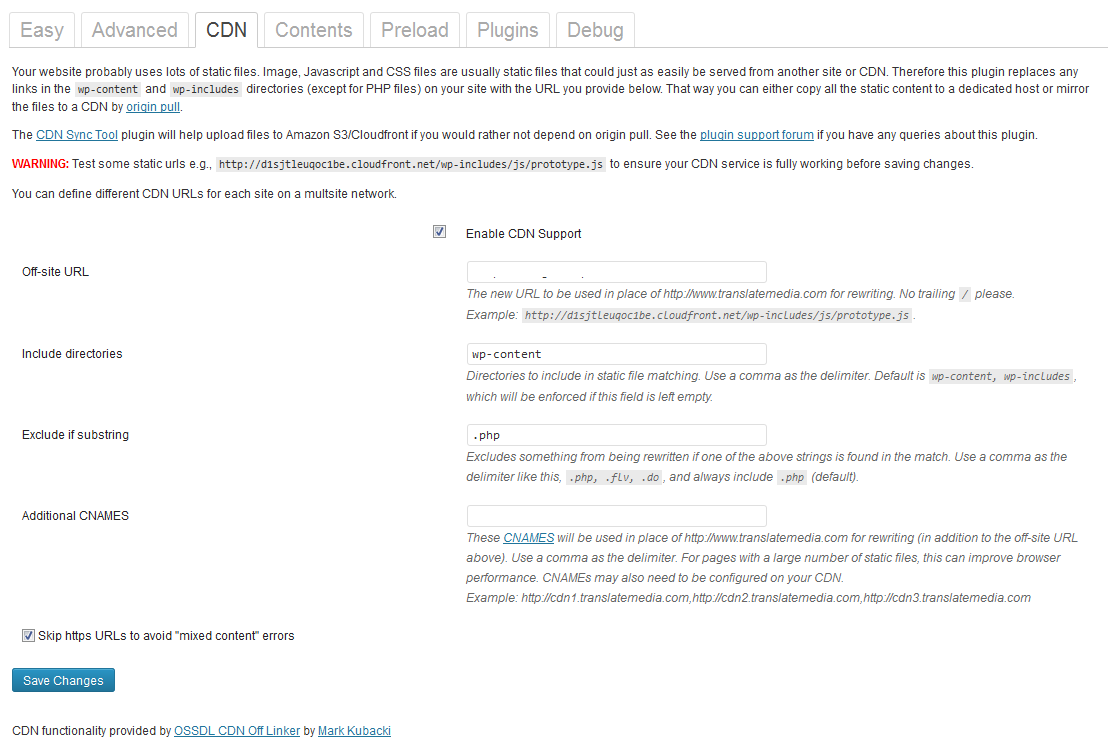
Once your CDN is set up and the CDN Sync Tool is activated and populated with the relevant settings as shown above, the final step is to enable WP Super Cache to start using the CDN to host your website’s static assets. These settings can be accessed through the left-hand ‘settings’ menu and by selecting the option for WP Super Cache.
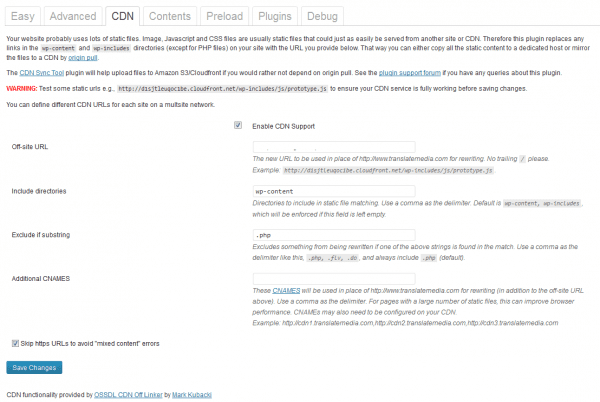
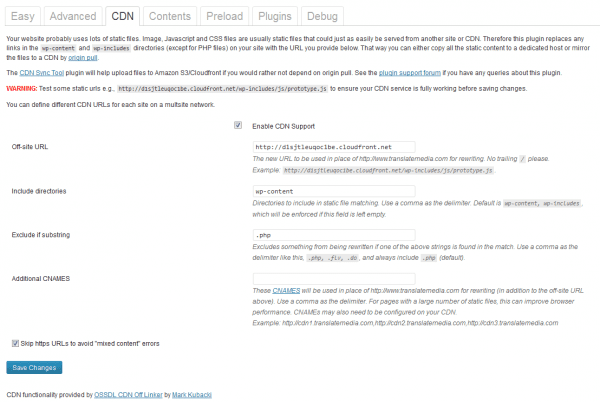
Once you’re on the ‘WP Super Cache Settings’ page, you need to select the CDN tab and input your Amazon Cloudfront distribution URL, which is the same as the ‘Hostname of CDN’ option specified above, include the directory ‘wp-content’, exclude the substring ‘.php’, and ‘Enable CDN Support’ as shown below:
By saving the changes, your website should now be placing all the images, scripts and stylesheets into Amazon Cloudfront. New media files will automatically be uploaded to the CDN so visitors to your website can look forward to fast loading pages and you can take advantage of the resulting increases in user engagement and conversion.

Thanks to
Yusuf Bhana for sharing his advice and opinions in this post. Yusuf is Digital Marketing Manager of
TranslateMedia. You can follow him on
Twitter or connect on
LinkedIn.