Integrating technical SEO within the development release cycle
Being a great online marketer also means being an excellent communicator and project manager. And search engines’ increased focus on content, usability and engagement means it’s more important than ever to integrate SEO with development, UX and editorial.
This teamwork is never more important than during a development release, when one line of code can mean your search performance (and traffic, and sales) can fall through the floor, but the reality of a release cycle and the ideal are usually very different. Top-level management input, commercial requirements, the dev team’s internal processes/structures and issues that crop up during the work can all mean that budgets are squeezed, priorities are forgotten, timeframes are reduced and projects are side-tracked.
Download our Individual Member Resource – Digital development brief
Creating campaign landing pages or make improvements to your existing campaigns using our dedicated development brief. By following our prompts, you'll create a detailed brief for your development team to follow that will minimize mistakes and misinterpretation, smoothing out the development process.
Access the Digital development brief
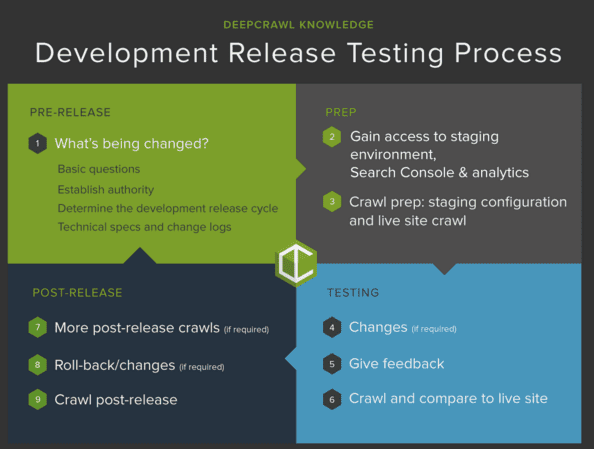
In this post we’ll explain a simple development release cycle that incorporates technical SEO testing. You can adapt this cycle to fit around your own processes.
Before we start: a note on tools...
To test for technical SEO issues during a development release, you’ll need a website crawler. This will crawl your website like a search engine would and report on any issues that you should fix in order to gain maximum performance from search results.
>We’ve used DeepCrawl for this post, but there are many other website crawlers to choose from. If you are going to be involved in the technical SEO testing process but are unfamiliar with how a website crawler works, then you might find it useful to read some background information first.
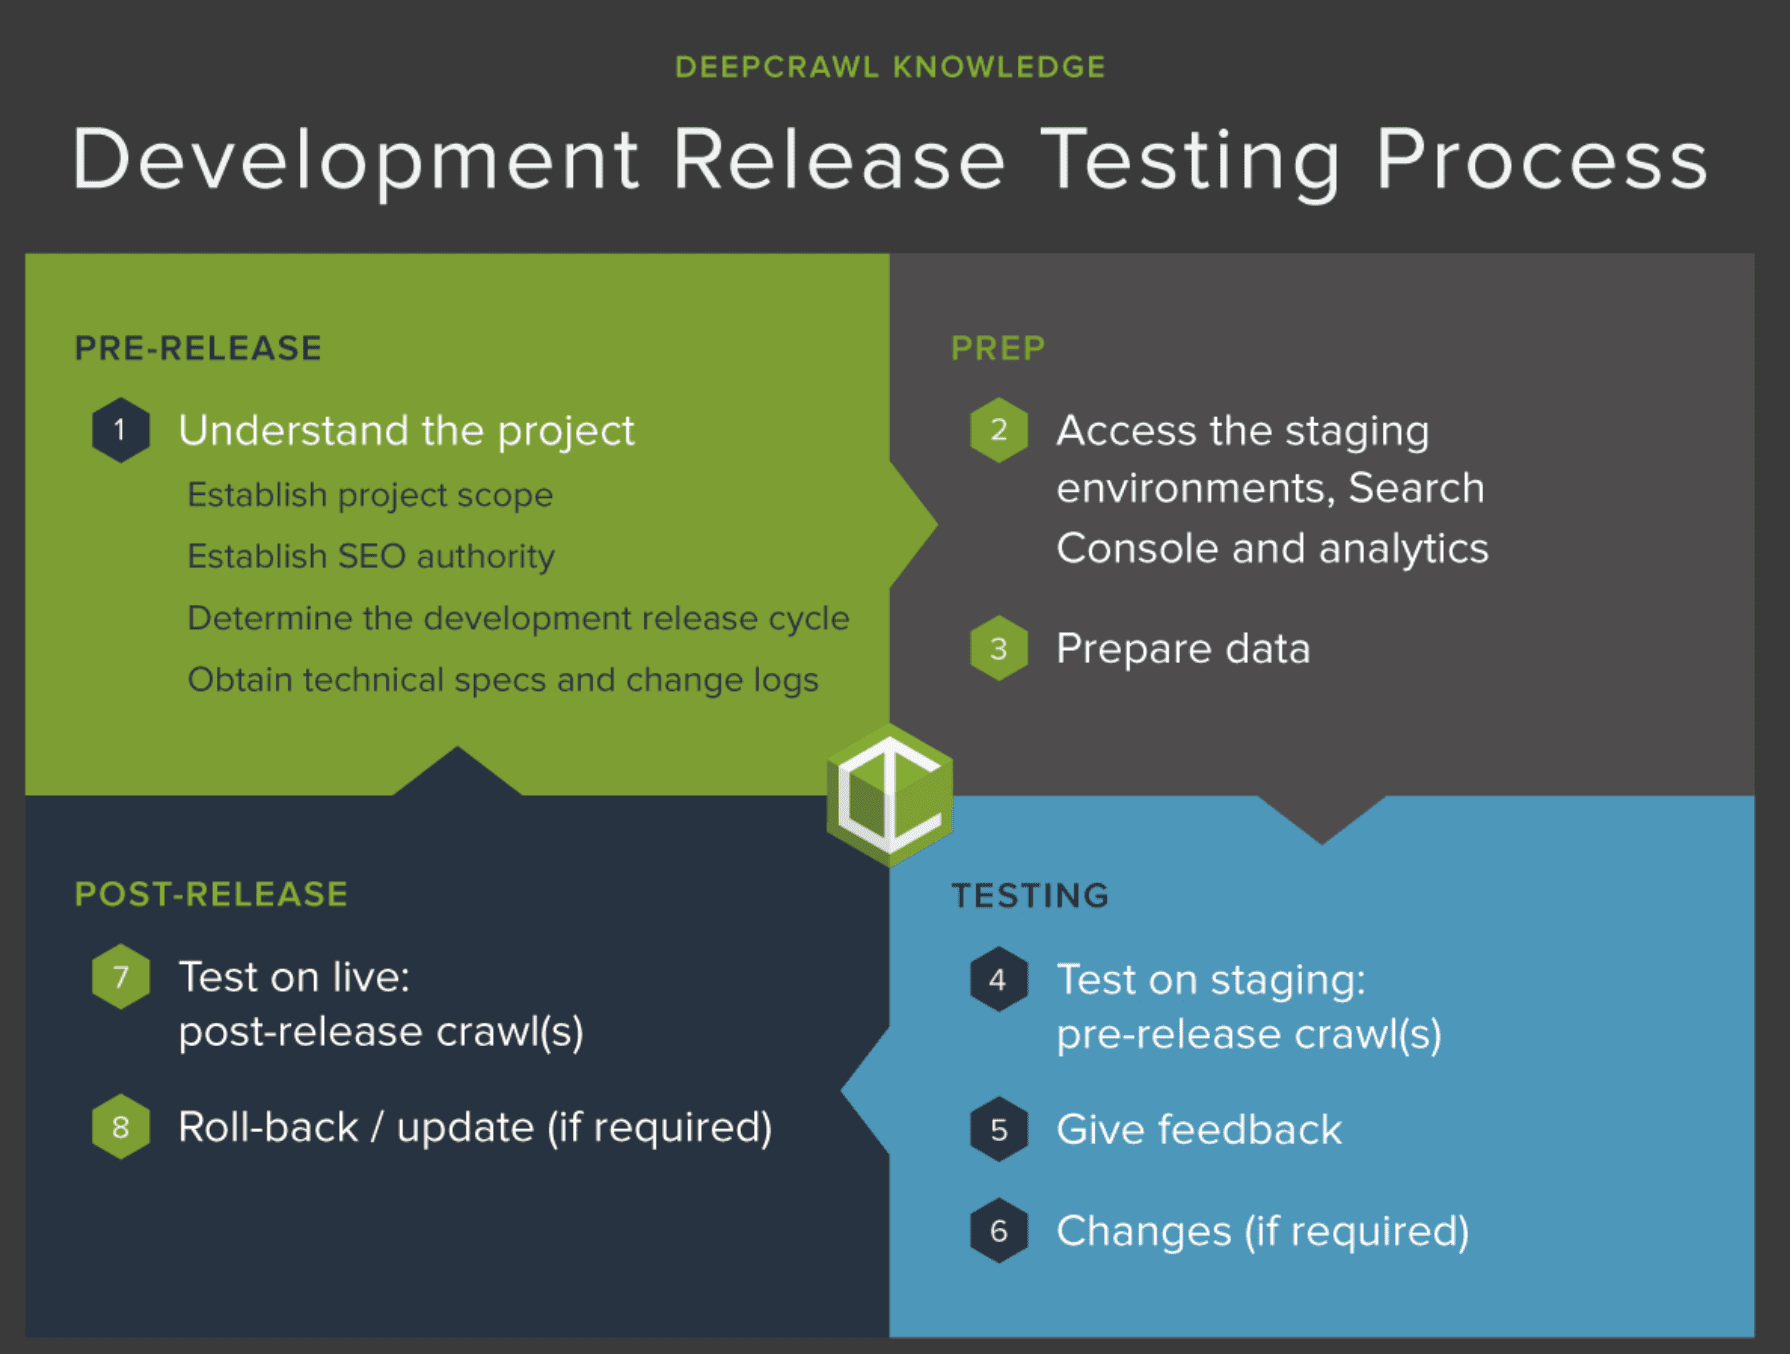
1. Understand the project
Establish project scope
The first step is to determine how the scope of the project will affect SEO (and, ideally, involve a technical SEO in its inception from the planning stages).
General questions such as the project motivation (what problem is being solved?), deadlines, priorities, team structure, project leader, key contacts, and the best format for feedback/updates (email / phone / scrum / meeting?) are just as important as technical questions at this stage, as they can help gauge the best way to test and establish authority.
Establish SEO authority
Ensure the project leader and dev team understand the impact that small changes can make to traffic and/or sales, and the importance of taking technical SEO testing into account.
Making priorities crystal clear at this stage will mean less chance of delays occurring from confusion when you’re further into the project.
Determine the development release cycle
While traditional projects demand that lots of changes are released at once, many development teams now opt for Agile/Lean projects, releasing selected changes in small batches. This makes it easier to roll-back and identify a cause of any issues (providing the changes are recorded).
However, the more frequent the release, the less time there will be to gather data for testing purposes: cycles for some releases can be reduced to days and are often based on the amount of development work required rather than the time it takes to test or the risks associated with the changes. The SEO’s main job at this point is to make sure there is enough time to crawl the staging to compare to the live site.
Obtain technical specs and change logs
Get full information on what’s being changed in a technical spec, and request access to a change log so that you can refer back post-release if there are any issues.
Now is a good time to identify which URLs (or sets of URLs) will be impacted by the changes, including what is at risk of being changed in error, so that the most efficient testing can be set up.
If work has already started...
Remember that point at the start about reality not living up to the ideal? Yep, in some projects the knock-on SEO effects of changes can be a mere after-thought after the work has already started. While this clearly isn’t ideal, it isn’t unheard of (unfortunately).
If work has already begun (or has been done) then it’s crucial to establish next steps and timeframes going forward. A strong working relationship within members of the team is invaluable here to make sure SEO and testing requirements are accounted for before the project goes live.
(Then, once the release is over, you can get on with refreshing the team’s memory about the importance of SEO…)
2. Access the staging environments, Search Console and analytics
Getting access to the staging site
>Gaining access to the staging environment at this stage for the purpose of crawling it before putting it live means fewer delays when it comes to testing, since it’s better to come across complications sooner rather than later.
Use your crawler to gain staging access with a static IP address, custom user agent, or basic username and password and crawl them in the same way as crawling a live site.
Crawling a staging site should always be discussed with the development team before running any significant crawls, as a staging environment is often run on less powerful servers than the live one. Big crawls can impact the speed at which the crawler can perform and also cause disruption to the development work if they affect the performance of the server.
Establish access to Search Console and analytics
Now is also a good time to make sure you and whoever is responsible for SEO has access to all versions (www/non-www and HTTP/HTTPS) of the site in Search Console and sufficient access to analytics to track if there are search performance issues after the changes are put live.
3. Prepare data
Decide how best to crawl the staging site now and configure the crawl so crawling can start as soon as you’re given the nod. It’s sometimes a good idea to limit the crawl to a few levels of the site if you’re pushed for testing time, depending on what will be impacted by the changes.
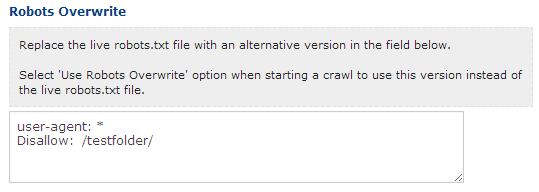
If the staging site is disallowed in the robots.txt file, copy the live site robots.txt directives into the overwrite feature of the crawler you are using.
Gather data on live site
Using your crawler's Test vs Live feature, you can compare the staging environment (complete with the new changes) to the live one. This highlights any changes that have been made that might have a negative impact on search engine rankings and traffic.
To prep for comparing the live site to the staging one, run a fresh web crawl on the live site.
Once the crawl has run, a typical web crawler will show which staging pages are non-indexable, redirected, canonicalized, duplicated, missing internal links and much more, meaning you can catch issues and get them fixed before they can make any difference to search performance.
Using a crawler for testing also means you can test new XML Sitemaps and robots.txt changes before they go live, crawl the site with modified URLs and test the impact of removing parameters.
Sites without a staging site
If the site that’s being tested doesn’t have a staging environment, then you’ll have to get everything tested after release. Ensure a crawl on the live site is set up ahead of time and be prepared to request a roll-back in case you find issues that could affect search performance (this is where the authority and good working relationships come in handy).
4. Test on staging: pre-release crawl
Once all the changes have been made to the staging site, then it’s time to start crawling: this is where things get really interesting, and when all the prep you’ve done will come in handy.
>Once the report has run, pay particular attention to the dashboard, where you can see the changes that have occurred between crawls. Big differences here should send alarm bells ringing:
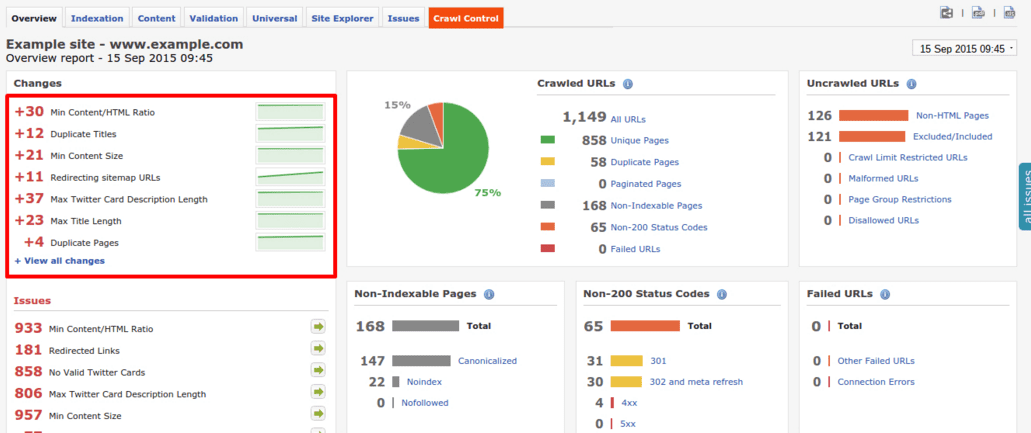
5. Give feedback
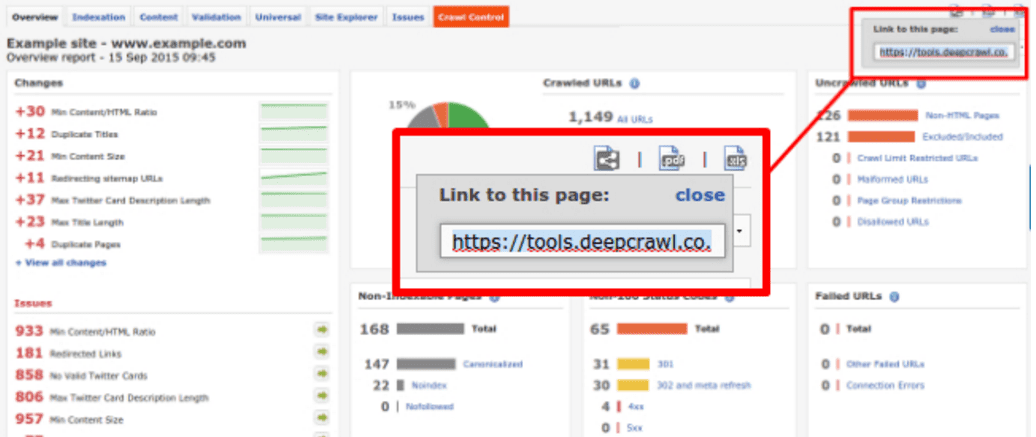
Create reports from the data that your crawler reveals, feeding back problems to key contacts and project leaders.
6. Changes (if required)
Be prepared to crawl again while changes are being made, to ensure the next round of feedback doesn’t cause any unnecessary delays to the release.
7. Test on live: post-release crawl
Run another crawl of the live site immediately after the release goes live, limited to a few levels to get quick results, and compare to the live list crawls that were run at the start of the process.
Watch the Search Console Crawl Error report and your analytics package (plus any other monitoring software you have available) like a hawk for a few days after release to watch for potential problems that slipped through the net during the testing process. Bear in mind that crawl errors will be delayed by two or three days in Google Search Console, so your analytics package is a better tool for immediate feedback.
8. Roll-back / update (if required)
Be prepared to ask for a roll-back in the most serious circumstances if a resolution isn’t imminent, comparing more crawls to find out what went wrong the first time.

Thanks to
Charlotte Gunnell for sharing their advice and opinions in this post. Charlotte is is an Online Marketing Specialist based in London, with a particular focus on SEO, copywriting and blogging. You can follow her on
Twitter or connect on
LinkedIn.


