A step-by-step Guide to producing Sitemap.xml to help Google crawl your content
An XML (Extensible Mark-up Language) sitemap is a form of markup language and is consisted of tags that define pages that should be indexed by search engines.
XML Sitemaps are designed for search engines and not for users. If you're new to the idea, and want to know how a sitemap looks like, they're typically available to see as a file sitemap.xml on the site, for example http://www.dell.com/sitemap.xml and these may link to other sitemaps for different countries and content categories, for example, http://www.dell.com/content-uk-sitemap.xml.
In this simple way we can easily identify if companies have a sitemap.xml and if the values in the tags, for each page, are properly implemented. These are some important tips that you need to consider when deciding whether to use XML Sitemaps.
- The XML optimisation will help us boost the indexation process of the site amongst search engine spiders by highlighting new and priority content.
- However, XML sitemaps are not essential since Google robots (spiders) will access different content by following links between pages and they will return to access new content. Google can't rely on every site having a sitemap.
- An XML Sitemap helps search engine spiders understand which pages are more important than others by setting a priority.
- It is important to update the sitemap.xml every time we create a new page in our website.
- An XML sitemap can help you review which pages on different sections of a site are indexed or unavailable using Google Webmaster Tools.
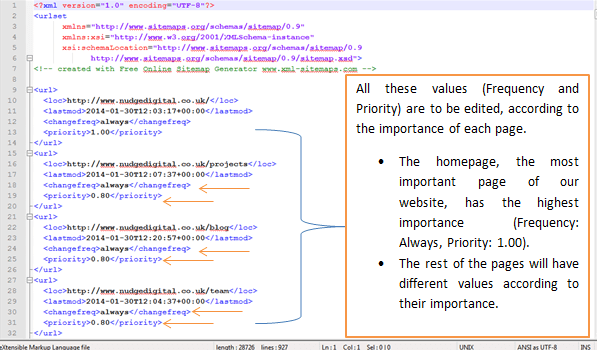
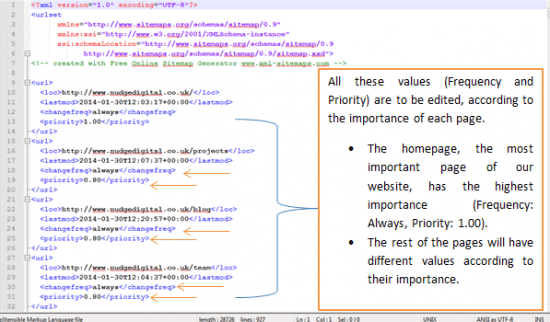
- Ideally we need to generate a sitemap for all pages of the site, by editing their priority and frequency. According to how important each page is in terms of Frequency (e.g. Daily, Weekly, Monthly etc.) and Priority (e.g. 0.75, 0.64, 0.25 etc.) the respective amendments should be made.
- Why suggest Frequency and Priority of each Page? Because in this way search engine spiders will be able to understand which page is actually more important than the other and in this way they will be able to allocate their (namely search engine spiders) budget by crawling more often the pages that are actually important, rather than spending their budget to less important pages.
- The Sitemap HTML (not XML) includes links; it is designed for users (it’s actually a page within the website) who want to navigate through the website.
- According to Google, there isn’t a guarantee that all pages will be crawled and indexed, but Google uses all the data that we provide them (e.g. last modification date, priority, frequency) in order to know more for the website’s structure.
- We need to ensure that the URLs are clean and descriptive.
- If we have multi-lingual websites, then we will need to generate the sitemap.xml in each language respectively as in the Dell site.
Without any further ado, we can now review the step-by-step process in order to generate a sitemap.
STEP 1 – Use of Sitemap.xml Generator
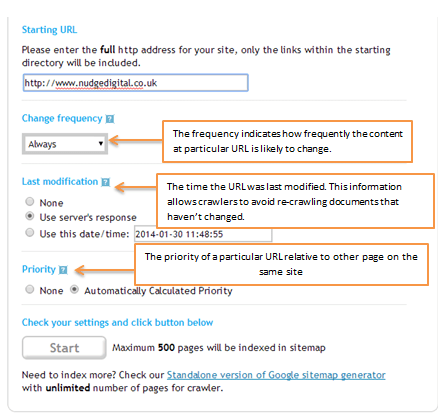
There are many online tools that can help you with the creation/generation of sitemap.xml. For this purpose, we are going to use this service : http://www.xml-sitemaps.com/. If you're running a WordPress blog or site, the Yoast SEO plugin includes a function for this.
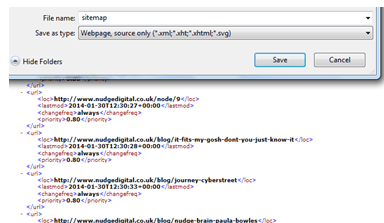
STEP 2 – Download the XML Sitemap
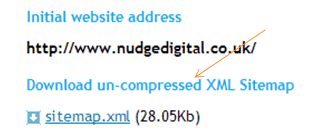
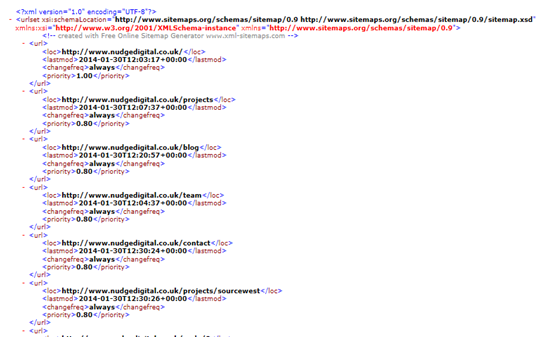
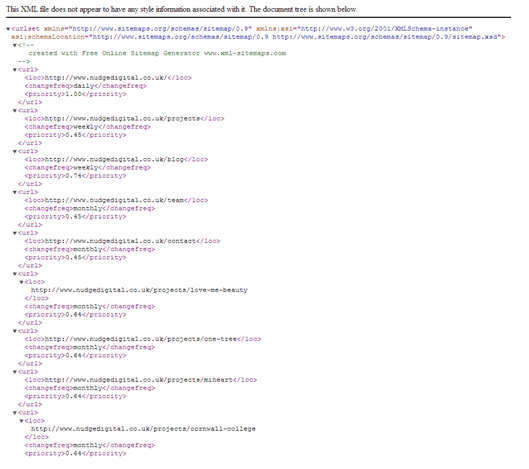
Once we choose to download the un-compressed XML Sitemap we will have this sitemap.xml ready (as we see on the screenshot below) that we will need to further edit (Priority and Frequency) . 
STEP 3 – Selecting the right editing tool
In order to start modifying the current Frequency and Priority, all we need to is to start using the NotePad ++. It’s a user-friendly software that can be installed on the desktop of our computers and facilitate our life regarding the editing of the sitemap.xml.
All we have to do now is to save the current form of the sitemap.xml on our desktop on a folder and start working on the Notepad ++ in order to edit the Frequency and Priority of each page.
STEP 4 – Sitemap.xml Editing
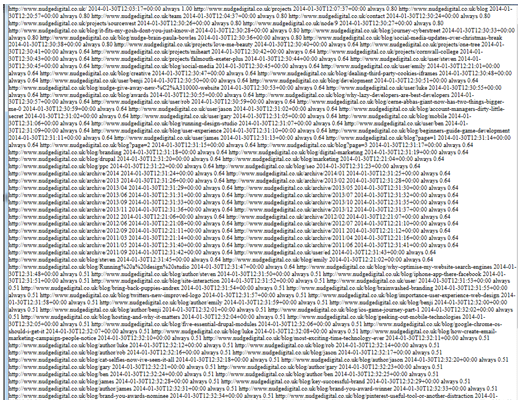
Important Tip:
We need to be really meticulous and thorough. We need to make sure that we haven’t deleted by mistake any of the tags that we are processing (e.g. <url>, </url> etc.).
For our case study, we have deliberately deleted a tag. In this case the final sitemap.xml will appear like this (please review the screenshot below) and we will probably need to review again the sitemap.xml until we spot the problem.
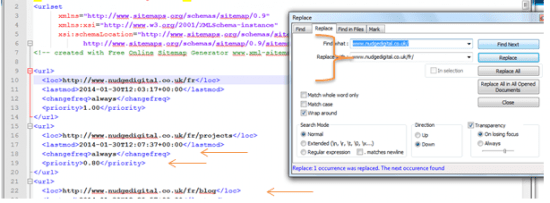
An extra tip for multilingual websites
If we have more than one language versions of a website, it is important to create sitemap.xml for each language respectively. There are cases where you handle large sites. The case in point we can automate the process by using Notepad++, simply by going to: Search > Replace and then just fill in the respective fields and include the language version for your sitemap.xml.
STEP 5 – Finalising the Sitemap XML
After the editing of the sitemap.xml (you can see the final version of the sitemap.xml below), the next step is the implementation of the sitemap.xml in the source code. Depending on our coding skills we can either implement it ourselves or a developer can implement it instead.
Implementation of Sitemap.xml on Google Webmaster Tools
Once the sitemap.xml is implemented by the development team, we will have to submit each language version of the website on Google Webmaster Tools (and on Bing Webmaster Tools).
Where are we going to find the respective Sitemap section?
Under the Crawl section, just click on Sitemap.
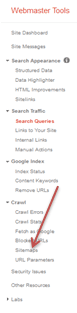
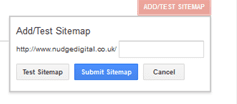
Afterwards, just fill out the respective field and you are ready to submit the website to Google Webmaster Tools.
Important Tip - Implementation of Sitemap.xml on Google Webmaster Tools for multilingual websites
In the event that our TLD (Top Level Domain) is a generic one (e.g. .com), in this case we will need to add/create our website in each language respectively. So if our website was www.nudgedigital.com (and if we had four language versions: Russian, French, German, Italian), then we would have to:
- Add our website on Google Webmaster Tools, not only on the TLD .com, but also we would have to include it in the other language versions as well.
- Arrange our Site Settings (the Geographic Target, or Geotarget) in each language version (e.g. com/de for Germany, com/ru for Russia, com/fr for France, com/it for Italy).
- Create a separate sitemap.xml, one for each language version.
I hope these steps give you an idea of how sitemaps can be setup if you have heard about them, but wondered how to set them up.